Pages

Friday, November 12, 2010

Stepping Back - A Halloween Layout


Unlike many of you who scrapbook, I have a hard time remembering (or finding the time) to scrapbook photos I've taken if too much time has passed. I thought I'd take a quick break from all of my Christmas projects, and create a layout for my favorite Halloween pictures from last month.

I have to admit one thing though...I haven't printed those photos yet, so I for the time being, I Photoshopped them onto the layout.

My boyfriend and I didn't plan on dressing up for Halloween, but when we were invited to his brother's Halloween party, we figured it would be fun to throw together some costumes. I did a little research online, and learned how to create fairly realistic wounds out of liquid latex and makeup. I think we made convincing zombies, don't you?

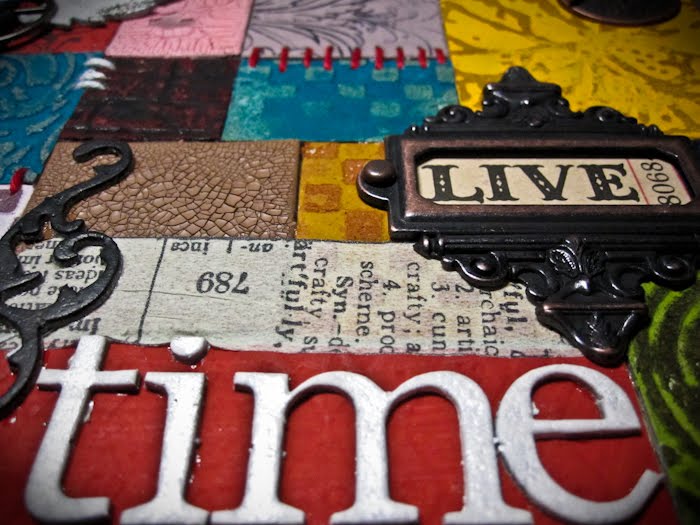
I used a few fun supplies to put together this layout. 

Bazzill Cardstock
My Mind's Eye Haunted Collection
Tim Holtz Clear Stamps -
Nature's Elements
Tim Holtz Stamps -
Odds and Ends
Tim Holtz Stamps -
Good Thoughts
Tim Holtz Die -
Ticket Strip
Rusty Pickle Stamps
Ranger's Archival Ink - Jet Black
Tim Holtz Distress Ink - Black Soot
Tim Holtz Distress Ink - Aged Mahogany
Tim Holtz Paper Distresser


Thursday, November 11, 2010

Giant Santa Tag: Another Tutorial


Last night, I had the WORST case of crafter's creative block you could imagine. I was sitting in front of tons of awesome Christmas paper, and more paper crafting supplies than I knew what to do with, and couldn't think of any way to use them...that is until my wonderful boyfriend came to my rescue. Keep in mind that while he appreciates all of the things that I'm able to create, this man has absolutely no interest in crafting whatsoever. He knows how much I love making tags, so he pitched his idea of using an extra large tag, strips of the My Mind's Eye Holly Jolly collection that I love so much, my favorite Distress Ink (Walnut Stain of course), and my stamps. He even insisted on red fibers at the top! Isn't it great! I don't know what I'd do without him :-D

Here's a quick tutorial:


Start by covering a #8 manilla tag, like these from Ranger, with the My Mind's Eye Holly Jolly - Holly Berries paper. I used Claudine Hellmuth Studio Multi Medium to secure the paper to the tag. Works wonderfully!


Apply more Studio Multi Medium to two more patterns of paper, and apply them to the tag at an angle. Distress the edges of the added papers by tearing them before the Multi Medium dries completely. Work quickly, or it'll be stuck for good :)

Distress the edges of the tag with the Tim Holtz Paper Distresser, and ink the edges with Walnut Stain Distress Ink.


Blend Stormy Sky Distress Ink into the blue paper, and Aged Mahogany Distress Ink into the red and slightly into the blue. Use Ranger's Jet Black Archival Ink to stamp your favorite santa onto the blue snowflake paper. Use a scrap piece of paper to mask off the edge of the red paper if you're worried about your santa stamp getting on that area.


Using Aged Mahogany Distress Ink, create a watermark effect by stamping on the red paper. You can also stamp various flourishes and script stamps with Archival Ink or Distress Inks all over the tag to create a Christmas collage effect.

Cover the entire tag with Rock Candy Stickles for a vintage glass look, and either allow to dry or dry with a heat tool. The Stickles will slightly feather the Distress Inks, but the Archival Ink won't budge - makes for a great effect! Add red fibers or ribbon to the top to finish it off!

Well, whatta you think? Wasn't his idea great? Leave us a comment and let us know what you thought.

Happy soon to come holidays!

Wednesday, November 10, 2010

First Santa of the Season!

Hello!

I am definitely starting to feel the holiday season approaching, and LOVE it! I've been working tons with the December kit from Club Ruby, which is absolutely amazing! If you're interested in joining the awesome Club Ruby community, head over there and sign up!

I thought I'd post a quick Christmas card tutorial to kick off my favorite season of the year!


This card is quick and easy, features my favorite Bo Bunny Santa stamp and my Tim Holtz Fab Flourish  stamp, and an eye-catching ribbon pleat!

Here goes:


1) Start with a standard A2 kraft card base. Using Ranger's Jet Black Archival Ink to layer Christmas stamps on the left side of the card.


2) Cut a 1.5x5.25 strip of the My Mind's Eye Haunted Collection. Distress the edges with a paper distresser and ink the edges with Black Soot Distress Ink. Adhere the strip to the right side of the card.


3) Pleat and adhere ribbon down the center of the My Mind's Eye paper. Lightly ink the two left corners of the card with Aged Mahogany Distress Ink.

There you go! A fun and simple card!

I hope everyone is starting to get into the holiday spirit. Check back for more holiday crafts!

Friday, October 8, 2010

A Sweet Domino Keychain


What a crazy week this has been! Last Friday, I signed my resignation papers at my job, and drove my loaded down little car all the way across the country from Houston, Tx to Flat Rock, MI. Sometimes in life, drastic (and scary) changes are needed, and that is exactly what I decided I needed! So far, I absolutely love it here, and am really enjoying the change of scenery. The leaves are changing color, which I am SO not used to, and the weather is super cool and crisp. The little town I'm living in is so quaint and quiet. Love it...

Anywho, as soon as I had my crafting table unpacked and setup, I got to work making keychains for the new house keys. I used a regular domino with a tiny eye screw screwed into one end. I used a mixture of   Alcohol Inks in - Wild Plum, Eggplant, and Pitch Black. After inking the domino and allowing it to dry for a few seconds, I used a Tim Holtz stamp and embossed the domino with black embossing powder. I sealed the whole thing with Super Seal from Creative Imaginations. To add a little jingle...I added a few Tim Holtz Idea-ology pieces to the chain...which was also from the Tim Holtz Idea-ology line :)


Monday, September 27, 2010

Altered Escape October - Margie Romney-Aslett

I am so excited to share my Altered Escape October class project with everyone!

Each year, Bazzill puts on an amazing event called Creative Escape. They bring in the top scrapbooking names and have each of them teach a class using their own product lines.

Margie Romney-Aslett used her line, The Girls' Paperie, as well as Tim Holtz product and beads from Scarlet Lime Bead Art to create an amazing collage charm necklace!


Scrapp'n Savvy has brought in the exact kits that Margie used to teach her class at Creative Escape, and I am so excited to be teaching the techniques used to make the necklace on October 23rd at 6pm.

The retail value of the product you'll receive is over $65, and get this...the class is only $45!!

You'll actually get enough product to make 2 necklaces easily. The value is un believable!

Because this class uses Margie's kits from Creative Escape, spots are limited, so if you're interested, sign up soon!

To sign up, contact me or Scrapp'n Savvy!

Sunday, September 26, 2010

Hello - A Shabby Chic Card


I made this card today for a special person, and I LOVE how it turned out! I had extra product from the Margie Romney Creative Escape Necklace class kit, so I decided to incorporate some of it into the card. The chipboard letters were the perfect size for this card :)

The card base is 4.25"x5.5" and opens off center from the front. I used the new Prismatics line from Bazzill, and printed paper from the October Afternoon Fly a Kite line.

For the ruffle trim, I used Tim Holtz's Love Is stamp and Timber Brown Stazon Ink on white tissue paper and then adhered it to the bottom of the card a little at a time in order to create the ruffle.

After adding a few stamps here and there on the printed paper, Stickling a Tim Holtz Adage Ticket, and distressing a top note cut from Tim Holtz's Styled Labels Alterations Die...this card was D-O-N-E!

Scrapp'n Savvy Sampler - New Location!

The Scrapp'n Savvy Sampler was a hit! 

Friday and Saturday, crafters were introduced to Scrapp'n Savvy's awesome new location and at least 5 of the teachers, and the larger store with tons of new product lines! They paid only $5 to make a Halloween mini book using the new We R Memory Keepers Heebie Jeebies line. Each instructor designed one of the pages of the book, and I designed the cover (using my favorite new Tim Holtz Rusty Hinge Distress Ink). Karrie was kind enough to allow the instructors to make a mini book too, and I love how great it turned out! I'm giving mine to my sister to fill with photos :)


If you live in the Greater Houston area, I have great news for you! There is a new scrapbooking store in town, and it is worth checking out! While it is only in phase one, construction will continue for the next few months, and will transform Scrapp'n Savvy into the newest and best scrapbooking retreat location in town! Scrapp'n Savvy will be taking reservations for retreats starting in January, so contact them today to book your get-away!

Look for a post about my upcoming Altered Escape classes soon!

Saturday, September 4, 2010

Quick Update!

Hello hello!

I wanted to swing by with a quick update. Life has taken me on an unexpected path, and I couldn't be happier, however, life has also left me with limited crafting time and a terrible internet connection :)

My classes at Scrapp'n Savvy have gone really well! I had two students sign up to make my bird house, and they left happy, and the necklaces that the ladies made in my August class were beautiful! Scrapp'n Savvy will be opening the doors of their permanent location soon...very exciting! I have a lot of class planning to do for the upcoming months, so that means I'll more than likely have some more creations to share with all of you :)

In other news (hehe), Club Ruby has launched, and it is IMPRESSIVE! I am one of the Master Designers for Club Ruby and can attest to the awesomeness that is Club Ruby :) The website is in Beta right now, with a select few members, but when the full launch occurs, I urge you to join!

Again, I apologize for my absence recently, but rest assured...I'll be back soon with more delightfully distressed creations!

Tuesday, July 20, 2010

She wanted to be an artist...or something


Hello Hello! It's been a few days since I've worked in my studio, so it felt GREAT to get back in there for a few hours today! I jammed my new Journey Greatest Hits album, and chatted with my mom while I worked. 

I wanted to try out the black and purple color combo, and somehow incorporate the new Angel Company stamps that I purchased....and this is what I came up with!

I lightly inked the entire tag with Victorian Velvet Distress Ink, then blended in Dusty Concord. I stamped the images with Jet Black Archival Ink, and the grungy dots in Dusty Concord.

To finish it off, I covered the entire tag with Rock Candy Distress Crackle Paint...and waited and waited and waited for it to dry...

(by the way...that little girl totally looks like me when I was younger...)


So, whatta you think???

Wednesday, July 14, 2010

Dog Food Soup: A Layout


I know, I know. Three posts in three days...I'm on a roll!

I really, really, really can't wait to see what everyone thinks of this layout. I used some new materials (card board and lace), and did some things that took me out of my comfort zone (like adhere my photos all crooked!), and it was so much fun!

The photos are of my niece, Che, making dog food soup at my mom's house. It was so great to see her squat down, smile, slowly pick up the dog food bowl, and check to see if anyone was going to stop her before she poured all of it into the water bowl.

Then commenced the splashing around in the Dog Food Soup :)

A few of the products that I used were:
Cardstock: Bazzill Prismatics Suede Brown Medium
Printed Paper: DCWV Rustic Stack
Tim Holtz Distress Inks: Walnut Stain, Tea Dye, Antique Linen, Victorian Velvet
Stamps: Tim Holtz Ultimate Grunge, Good Thoughts, Flights of Fancy


Tuesday, July 13, 2010

Game Time: An Awesome Tag


Hi everyone!

I feel like I've been neglecting my bloggers lately, so today I thought I'd share a tag that I made just for fun! It's a rare occasion that I make something that isn't related to my design team work, or a class project, so I'm excited about this one! Let me know what you think!


Products Used:
Distress Ink - Rusty Hinge
Distress Ink - Walnut Stain
Distress Ink - Tea Dye
Distress Ink - Wild Honey
Staz-on Ink - Timber Brown
Alterations Texture Fades - Checkerboard
Alterations Strip Die - Tickets
Tim Holtz Stamps - Game of Life
Tim Holtz Stamps - Ultimate Grunge
Maya Road Wood Bingo Calendar Numbers
Tim Holtz Paper Distresser
Glossy Accents
Pop Dots


Quick Walk Through:
1: Ink entire tag lightly with Rusty Hinge Distress Ink, and blend in sections of 
Tea Dye and Wild Honey.

2: With any of those Distress Ink colors, stamp images on the background from the Ultimate Grunge collection, and stamp the saying from the Game of Life collection in Rusty Hinge.

3: Emboss one corner with the Alterations Texture Fades - Checkerboard, and rub the Walnut Stain Distress Ink pad directly onto the embossed areas of the tag.

4: Stamp the Bingo stamp from the Game of Life collection onto a separate piece of cardstock
 with the Staz-on Ink, and cut it out.

5: Ink the edges of the bingo image with the Walnut Stain Distress Ink, and distress the edges 
with the Paper Distresser.

6: Die cut a ticket with the Alterations Ticket Die, and stamp the ticket image on top with the 
Staz-on Ink.

7: Ink the edges of the ticket with Walnut Stain, and distress the edges.

8: Adhere the bingo card, ticket, and game piece to the tag using Glossy Accents (or glue dots). Play with the paper, and roll the edges or crinkle the paper when you adhere it!

9: Distress and ink the edges of the tag.

Enjoy! If you make something similar, let me know! I'd love to see :)

Monday, July 12, 2010

Home Mini Album: A Class

Hello hello!

I know that I haven't blogged in a few days, but I have been super busy! Today, I want to share a project that I made during a class at Scrapp'n Savvy. Nancy teaches at Scrapp'n Savvy as well. Her class is called Make Mine Mini, and it is SO awesome! You can visit her blog to learn more about her and her projects!


During her class last week, we made this mini album about home. I had never made a mini album before this class, and she made it so easy! She incorporated products from the My Mind's Eye So Sophie line, and images from a House of 3 collection. She even let me do my distressing :)

I can't say enough nice things about this album!


Thanks for a great class Nancy! I'll be back for more!

Look for a few more updates this week, I've got more projects coming!

Thursday, July 1, 2010

A "So Sweet" Layout


Isn't she a doll!

My niece, Che, pulls on some special heart strings of mine. I don't get to see her often, but when I do see her, our similarities amaze me.

There were a few firsts on this layout:

First time using Tim's Caged Bird Die (seriously, why did it take so long?)
First time using Tim's Elegant Flourishes Die (though I've used the pre-cut Grunge Board flourishes)
First time using printed paper as my main background paper (which I kind of like - opinions?)

Main Product used on this layout:
Cardstock: Bazzill Prismatics Sugar Cream
Printed Paper: My Mind's Eye - So Sophie Sisters
Flowers: Bazzill French Vanilla Lily, Prima Hydrangeas
Ink: Tim Holtz Distress Ink - Antique Linen, Walnut Stain, Victorian Velvet, ColorBox Chestnut Roan


Thank you so much for taking the time to stop by my blog.

If you have the chance, leave me a comment, and tell me what your favorite element of this page is...
I'm curious :)

Wednesday, June 30, 2010

Jello: The Simple Things Part 2


This is the coordinating layout to the first "Jello" page. Very simple - I didn't want to take away from the photo :)

Isn't that face adorable! Definitely the 'squishing jello between your teeth' face.

The same basic products that were used to create the first page were used int he creation of this one :)

Thanks for stopping by!

Monday, June 28, 2010

Jello: The Simple Things


Yesterday, my brother and his beautiful (and awesome) wife brought their 4 kids to my mom's house to say goodbye. They are all moving to Missouri today, and we're going to miss them so much!

This layout features their youngest, Che. She is 2, and for some reason, she happens to look and ACT just like me - even though my brother and I don't look alike at all. While they were visiting yesterday, I snapped quite a few photos of her eating (or attempting to eat) Jello on my mom's couch. I got a few hilarious photos, but I'm saving those for another layout.

This layout was inspired by the last class that I took with Karrie Allen at Scrapp'n Savvy. You can see her pages from that class in a video here. All of the layouts that we were taught were interactive, and I LOVED the waterfall page. How perfect if have a lot of photos for one page!


Products Used:
Cardstock - Bazzill
Paper - My Mind's Eye - Simply Delightful
Stamps - Tim Holtz (of course), and Unity
Ink - Ranger Archival Jet Black
Jewels - Bazzill
Alpha Stickers - Thickers


 When you pull the waterfall tab down, I have some hidden journaling that reads:
"Che, Your personality amazes me! Each time I'm able to spend time with you, I can't stop smiling! By the way, your Nana never let ME eat Jello on the couch!
Love, Aunt Courtney"

Saturday, June 26, 2010

Future Class Sneak Peek

What a fun day! My husband and I spent the day at the Scrapp'n Savvy studio. While he worked on their website, I worked on a project for a future class.

Normally, I wouldn't show off a project before class, but I just HAVE to give you all a sneak peek of this one. I hope you like this charm bracelet as much as I do!


Last weekend, at the Scrapp'n Sampler, most of the women seemed most intrigued by my August jewelry class, so I've decided to come up with a few more altered jewelry classes!

Product availability and delivery effect the date of this class, so I will keep you all posted!

Thanks for stopping by!

Thursday, June 24, 2010

Believe in Dreams


I really love how this layout came out :) I blame it on the awesome Glee music that I had playing while I worked.

I wanted to stick with black, grey, and white on this page - a lot more difficult than I thought!

You might notice that I used the stamp that Tim gave to my husband (to give to me) :)

The title, Believe in Dreams, was compiled from 3 different packs of rub-ons.


The tag that slips behind the photo mat looks like this:


It says:
"I took this photo in front of Tim's booth to remind me that anything is possible. I'm going to follow my dreams - I can't wait to see where they take me!"

Thanks for taking the time to check this out!

Side note: If you haven't watched Glee, you are missing some seriously awesome stuff :)

Hey Tim - again


I know that I've already done a layout with this photo, but I wanted to give it another try. I think I like the first page, here, better.

I utilized my new Tim Holtz Tissue Tape (which I totally love), masks, some crackle paint, an element from Tim's new paper, Tim's Alterations Die,  and a piece of film strip.

Thanks for looking!

Monday, June 21, 2010

Patchwork Pandemonium - A missed opportunity?

A little background on this project.

Tim Holtz (you know who that is, right?) teaches a few different classes when he travels from state to state, and one of those is Patchwork Pandemonium. My mom and I got word that Tim would be returning to Texas in August to teach at a store in Plano, and we were planning on signing up for his patchwork class. I would LOVE to take a class with Tim (who wouldn't?), and I am also in great need of a photo with Mario (that was unable to occur the last time we met) :)

Get this, Tim wrote on his blog that he would be retiring the patchwork class. I was so sad! Of course I'll be able to take another class, but still...that thing was cool!

After looking at photos of a few different versions of the project, I figured out the basic measurements, and realized that is was probably something that I could do myself. I emailed Tim, and he was generous enough to give me permission to recreate the project and post it on my blog! What a nice guy :)

This is what I came up with :)


I used SO many of the techniques that I know, and just about every distressing tool and medium that I own. I am so pleased with how it turned out.

Scrapp'n Savvy News

Scrapp'n Savvy is the local scrapbooking store that I work for, and I am SO excited to announce that www.scrappnsavvy.com was launched today!

I have met the very bet people at Scrapp'n Savvy, and I can't wait to help continue to build it!

If you're interested in signing up for any of my classes, you can now do that, securely, online! If you have the chance today, browse through the site, and let me know what you think :)


Also, this week was my turn to do the weekly layout at Scrapp'n Savvy!